
Last month for Shmoocon I decided I wanted to expand my skills a bit and take a shot at something I hadn’t really done much of in my InfoSec career lately, not since way back in the WEP and Linux Zaurus technology years. Wireless hacking, i.e. a Wireless Capture The Flag event.
I’ve done some appsec testing, network pen testing, and similar in the past, but more side of desk to my core roles. I haven’t played much in the wireless world, even after getting my Technicians class radio license last year (also at Shmoocon, baby steps I guess), so made the choice to learn as much as I could in my few days at the conference from their WCTF event put on by the good folks at Wireless Village.
These pages will describe what I’ve learned. Order is hardware discussion then software discussion. There will be references to some of the software tools in the hardware section, but don’t fear, all will be made clear in the end if you were like me and new to the subject. Any software/terms mentioned early on aren’t critical, just for future reference as you manage to read through this page.
The WCTF Laptop hardware
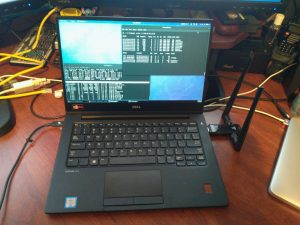
The laptop: Dell Latitude 7370 with Fedora 27
To start I needed a laptop. I have my personal Macbook Pro 13″ and an old Dell Vostro, but I didn’t want to deal with the silliness that MacOS presents to non-Mac’y things, and the Vostro is an ancient heavy 15″ stuck in the 32bit world. I wanted something reasonably small, good battery life, great high-res screen and both USB-C and USB 3.0 ports to support a wide range of addons (like the wireless card I’ll talk about later). I was targetting something that could handle four threads with no problem and at least have 16GB of ram and 256GB of SSD storage. Also, needed to fully support Linux, and for well under $1K since I already had a perfectly fine daily laptop in the Macbook Pro.
The above quickly relegated me to the refurbished or used world. Doing some searches I eventually found the Dell Latitude 7370 series. This met all my requirements: ~2.5lbs weight, Intel M7 CPU, 16GB Ram, 256GB of Storage, QHD+ 3200×1800 13.3″ Touch Screen, WiFi AC, BT, USB-C and USB 3.0 ports. And reports from the web said Linux installed fine on it. Final key point, you can find these laptops (depending on exact spec) ranging from $500-800 refurbished, and often with a 3 year Dell hardware warranty included. I managed to get mine on-sale at Newegg.com for a hair over $700 fully loaded about a week before Shmoocon.
Though the laptop came with Windows 10 Pro installed, I shrank the partition down and installed a dual boot with Fedora 27 (here is a straight forward write up). I did a UEFI install of Fedora so that I could leave EFI Secure Boot enabled. That caused some headaches (I mean learning opportunities) later when I was dealing with kernel modules for my new USB wireless card, but my goal was not to compromise host os security if at all possible. I have kept the dnf security update process intact, I run SELinux enforcing, secure boot enforcing, encrypted partitions, and firewall, at all times. Though there is always some level of “trust” that must be placed in Open Source software providers, I also make sure my dnf system has current keys and verifies software signatures regardless of providers. So far there are only three software components that aren’t handled via dnf, which I’ll go into later. I also made sure to create a new user and make them an “Administrator”, which is separate from the all powerful root user.
Hardware wise, almost everything works, and everything I needed did. The only items I have not gotten to work in Linux is the fingerprint scanner, the WWAN, and the ID card reader. And really, I just haven’t tried, maybe in Part 3? There were only tow key changes I made to the standard Fedora install to make the hardware more effective.
First, was to add more scaling options to the monitor framebuffer. Under “Settings -> Devices -> Display” by default you only have a couple of choices for scaling. 100% and 200% just weren’t right for me, needed something in between that didn’t punish my eyes but still took advantage of that lovely high resolution. With the following command at the command line:
gsettings set org.gnome.mutter experimental-features "['scale-monitor-framebuffer']"
I was able to add additional choices, and found that 175% was the perfect scale for my vision.
Second was to add a gnome shell extension called “Block Caribou”. This shell extension stops the virtual keyboard from popping up on the screen if you happen to use the touch screen. Between accidently tapping the screen, and just trying it out, I don’t need another keyboard popping up and getting in the way of doing work. Easier to keep it off using the shell extension. You should be able to find it in the Fedora software shop under “add-ons -> shell extension”. Ctrl-F to search for Caribou.
The WiFi: ALFA AWUS036AC 802.11AC 2.4/5Ghz
Though the Dell came with a perfectly good Intel 8260 802.11AC wireless network card, I wanted to have one that I believed had better support in the aircrack-ng community of tools and with solid monitor capability. Also would like to stay on-net while learning my WCTF skills (access to online documentation and all). Did some research and decided Alfa seemed to be making a large range of well supported USB adapters and that the AWUS036AC had driver support covering both 2.4 and 5Ghz networks in up-to the AC protocols. What I didn’t learn until after my purchase and one day before Shmoocon, is that the support was “experimental” and limited. But, in the end I was able to get it to work effectively for at least the basic skills I mastered. Here is how:
Driver install:
This is the part I learned before Shmoocon. There was no built-in driver for my Alfa card. This I expected, so had already found the supported source code for the 8812au driver needed for this wireless card’s chip and aircrack-ng. Install could be handled in two ways, “dkms” or manual “make” commands. I originally went with dkms thinking it would make kernel upgrades easier, I was wrong. Never cleanly integrated with Fedora kernel upgrades and with the need to sign drivers (details in a bit) I was stuck doing a lot of manual clean up and re-install work for the driver on each kernel update. Stick with “make”, it’s easier. Also, stick with the 5.1.5 branch for now, the 5.2.9 branch has issues. This is what I did:
- Download the driver, you can either download a zip archive or use git to pull a copy from the repo (I’m showing the .zip method below)
- Make sure your user is setup as an administrator with access to sudo and wheel
Hopefully you chose your primary Fedora user as an administrator when setting up, if not you may want to read up on User/Group Management in Fedora - Make sure you have the latest source/headers for your kernel and build tools so you can build your kernel module against it.
sudo dnf install kernel-devel kernel-headers dkms make gcc gcc-gdb-plugin libgcc glibc-headers glibc-devel - Create a new directory using root/sudo in /usr/src called /usr/src/rtl8812au-5.1.5
sudo mkdir /usr/src/rtl8812au-5.1.5 - Change permissions on it so that your regular user can handle the compiling part (save root permissions for when you really need them)
sudo chown root:wheel /usr/src/rtl8812au-5.1.5
sudo chmod g+w /usr/src/rtl8812au-5.1.5 - Copy the downloaded source code and tree into the directory as your normal user
sudo cp rtl8812au-5.1.5.zip /usr/src/.
cd /usr/src/
unzip rtl8812au-5.1.5.zip - Build the source tree with make
cd rtl8812au-5.1.5
make - Install the source tree with make (need root again)
sudo make install
Now if you aren’t using secure boot, you are good to go with the driver working. If you are using secure boot then you have to sign these drivers with a EFI recognized certificate or the kernel will refuse to load them. That’s a good thing, throws more hoops that malware would need to jump through to gain persistent access on your system. But it means a little upfront work on your part, and one additional command line entry step each time you install/update the driver in the future. I think it’s well worth the effort and learning experience, the following is based on:
- First you need to create a certificate pair for signing (keep these certs protected, and replace “mycert” with something relevant to you)
sudo dnf install mokutil
mkdir .mokcerts
chmod o-rwx .mokcerts
cd .mokcerts
openssl req -new -x509 -newkey rsa:2048 -keyout MOKmycert.priv -outform DER -out MOKmycert.der -nodes -days 36500 -subj "/CN=mycert/" - Then you need sign your new drivers
sudo /usr/src/kernels/4.14.16-300.fc27.x86_64/scripts/sign-file sha256 ./MOKmycert.priv ./MOKmycert.der /lib/modules/4.14.16-300.fc27.x86_64/kernel/drivers/net/wireless/8812au.ko - Now you’ll need to request adding your cert as a trusted cert in EFI
sudo mokutil --import MOKmycert.der
(remember the password you set, you will need it later!) - Still not done, now you need to reboot and install and confirm your cert to EFI
On reboot the system should automatically detect the key addition request above and boot into the MOK key management system. Here you will be requested to provide passwords and accept the addition of your key. Unfortunately this may vary some depending on bios version and hardware so I can’t provide a lot of guidance here, just read carefully and follow the prompts. Also, REMEMBER YOUR PASSWORDS! - Now when you finish rebooting your signed kernel driver for your Alfa should load fine.
Unfortunately on every new kernel you will need to rebuild the module, install it, and sign it. That consists of the following commands (and making sure you are in the correct directories you used in the above steps):
- In the /usr/src/rtl8812au-5.1.5 directory:
make clean
make
sudo make install - In your .mokcerts directory (making sure you are referencing the new kernel directory):
sudo /usr/src/kernels/`uname -r`/scripts/sign-file sha256 ./MOKmycert.priv ./MOKmycert.der /lib/modules/`uname -r`/kernel/drivers/net/wireless/8812au.ko
The uname -r will insert the current kernel into the command, if you updated your kernel but hadn’t rebooted yet, it will be the wrong kernel version as you are still running the old kernel. You’ll need to manually figure out the kernel path.
You could script all the above into one command to make it easier to do on each new kernel upgrade.
Stopping NetworkManager from messing your aircrack-ng up:
This part I fully figured out on the last day of Shmoocon, unfortunately it really messed up my WPA hacking and I didn’t realize it until it was to late to fully recover before the end of the WCTF. If you don’t do this you will be able to slowly crack WEP, and you’ll see things on WPA, but none of the techniques will work. It will look like it’s working, but it really isn’t. NetworkManager (which manages all your network connections) will constantly mess around with your monitor and packet injections even when it looks like it’s not. Took some digging and testing, but finally found a nice way to get NetworkManager out of the way.
- First plug in your new network adapter and find out what interface name and mac address gets assigned. I would suggest running the command once before you plug it in and once after so you know which one is the new interface
ifconfig
with output like:
NNNNNNNN: flags=4163<UP,BROADCAST,RUNNING,MULTICAST>  mtu 1500

inet 192.168.210.132  netmask 255.255.255.0  broadcast 192.168.210.255

inet6 fe80::c200:dca9:632:dbba  prefixlen 64  scopeid 0x20

ether XX:XX:XX:XX:XX:XX  txqueuelen 1000  (Ethernet)

RX packets 226897  bytes 315230079 (300.6 MiB)

RX errors 0  dropped 0  overruns 0  frame 0

TX packets 33918  bytes 4726882 (4.5 MiB)

TX errors 0  dropped 0 overruns 0  carrier 0  collisions 0
or
ip -a link
with output like:
2: NNNNNNNN: <BROADCAST,MULTICAST,UP,LOWER_UP> mtu 1500 qdisc mq state UP mode DORMANT group default qlen 1000

link/ether XX:XX:XX:XX:XX:XX brd ff:ff:ff:ff:ff:ff - Next you will need to open the following file to edit:
sudo vi /etc/NetworkManager/NetworkManager.conf - You need a section with the following:
[main]
plugins=ifupdown,keyfile - Then after that add a section with the following:
[ifupdown]
managed=false - Finally have a section with the following where the XXXXs are replaced with the MAC address and NNNNNNN is the interface name found above
[keyfile]
unmanaged-devices=mac:XX:XX:XX:XX:XX:XX;interface-name:NNNNNNNN - Now save the file and restart network manager
systemctl restart NetworkManager - That should now cover you. You can check by running the following command and confirming it says unmanaged:
nmcli dev status
with output like this:
DEVICE     TYPE      STATE      CONNECTION

wlp108s0    wifi     connected   wifinet

lo          loopback unmanaged   --

NNNNNNNN    wifi     unmanaged   --
Now NetworkManager should stay out of the way and allow you to have fun.
Next: Installing our pen-testing tools
I based the software I installed on the Pentoo Linux security focused distribution. You could go the route of just installing Pentoo or Kali, and that’s fine, but I wanted a more general purpose setup. I also wanted to make sure I was familiar with the small details that go into installing, using, and maintaining the software stack.
And those details will be for part 2….but here is a taste
From the base Fedora repo you can install an important tool aircrack-ng to get started. From the command line run:
sudo dnf install aircrack-ng
When that finished up you can insert your wireless card and run the following command to start listening to what’s broadcasting around you (with NNNNNNNN being replaced by your actual wireless interface you worked on above):
sudo airodump-ng NNNNNNNN
Till next time…
Pingback: Cafaro's Ramblings » Building a Pen Testing Laptop from Scratch ( WCTF / CTF Laptop ) part 2